Friday, November 18, 2011

White Chocolate Brownie Cake


This post was meant to go up in July, but alas, it's here now.


I needed a simple birthday cake idea for my 2nd daughter's first birthday party.  It needed to be simple.  We were going to the U2 Concert in Moncton, NB, Canada the next day and then were having the birthday party on July 31, 2011, the very next day.  It takes 2 1/2 hours of just driving time to get home from Moncton and it took a long time for 80 000 people to get down from Magnetic Hill and on the road.  We were exhausted the next day, that's for sure.  


I went on my Sweet Treats board on Pinterest (which any of you should join, because it's FREE and amazing - you can follow me, just click on the "Follow Me on Pinterest" button on the top of this blog) and found the White Chocolate Brownies Recipe that I've wanted to try for some time now.  This was the perfect excuse!  The recipe was found here and I just doubled it to make more of it, so I could put it in a round form to make the cake.  The recipe below is adjusted for my cake, but you still have to double it!

Prep Time: 15min
Cook Time: 33min

Ingredients
125g butter, chopped
250g white chocolate chips
1/2 cup brown sugar, firmly packed
2 eggs, lightly beaten,
1 1/4 cups plain flour, sifted

Use a 9 inch cake pan.  Generously spray with non-stick baking spray or line with paper cases.  The oven should be preheated to 160 C (325 F).
1. In a microwave safe bowl heat the chopped butter on high for 30 seconds. Stir, then repeat for another 30 seconds - the butter should be melted. Add the white chocolate and heat for another 30 seconds. Remove and stir until blended. You may need a further 20 seconds. Stir until smooth. Cool slightly so that you do not cook the eggs when you add them.
2. Add the brown sugar and the beaten eggs.  Stir through.
3. Add the sifted flour and stir through until smooth.
4. Bake in a preheated oven set to 160 C (325 F) for 33 minutes.
5. Remove from the oven and leave to cool in the pan for 10 minutes before removing to a cake rack to cool completely.  Lift out carefully.
6. Store in an airtight container for one week. The white chocolate brownie cake can be frozen for up to two months.


I thought the cake turned out quite nicely but it was very dense.  If you make Brownies, they might be less dense, but I'm not sure.  I guess I'll just have to try it sometime! :)
For the decoration of my little girl's first birthday cake, I used Dr. Oetker Ready Rolled Marzipan, that I picked up at our Specialty Food Store in Bedford, NS called Pete's Froutique.  They only carry it around Christmas time.  If you're lucky enough to live in the UK, you can buy it online here or they might carry it in Tesco etc.  You can google how to make Marzipan, too - it's quite simple.  Here are the instructions from the Ready Rolled Marzipan on how to put it on the cake:
1. Turn cake upside down for a smoother surface and place onto cake board.


2. Use a knife to thinly cover the cake with cool boiled jam (I used Raspberry jam).


3. Roll out marzipan (this was not part of the instructions, as it was already rolled).


4. Carefully fold disc in half around inner tube (or on your rolling pin).
5. Holding the ends, lift disc, placing it over the centre of your cake.


6. Smooth marzipan over top of the cake and carefully pull out folds while smoothing down sides.


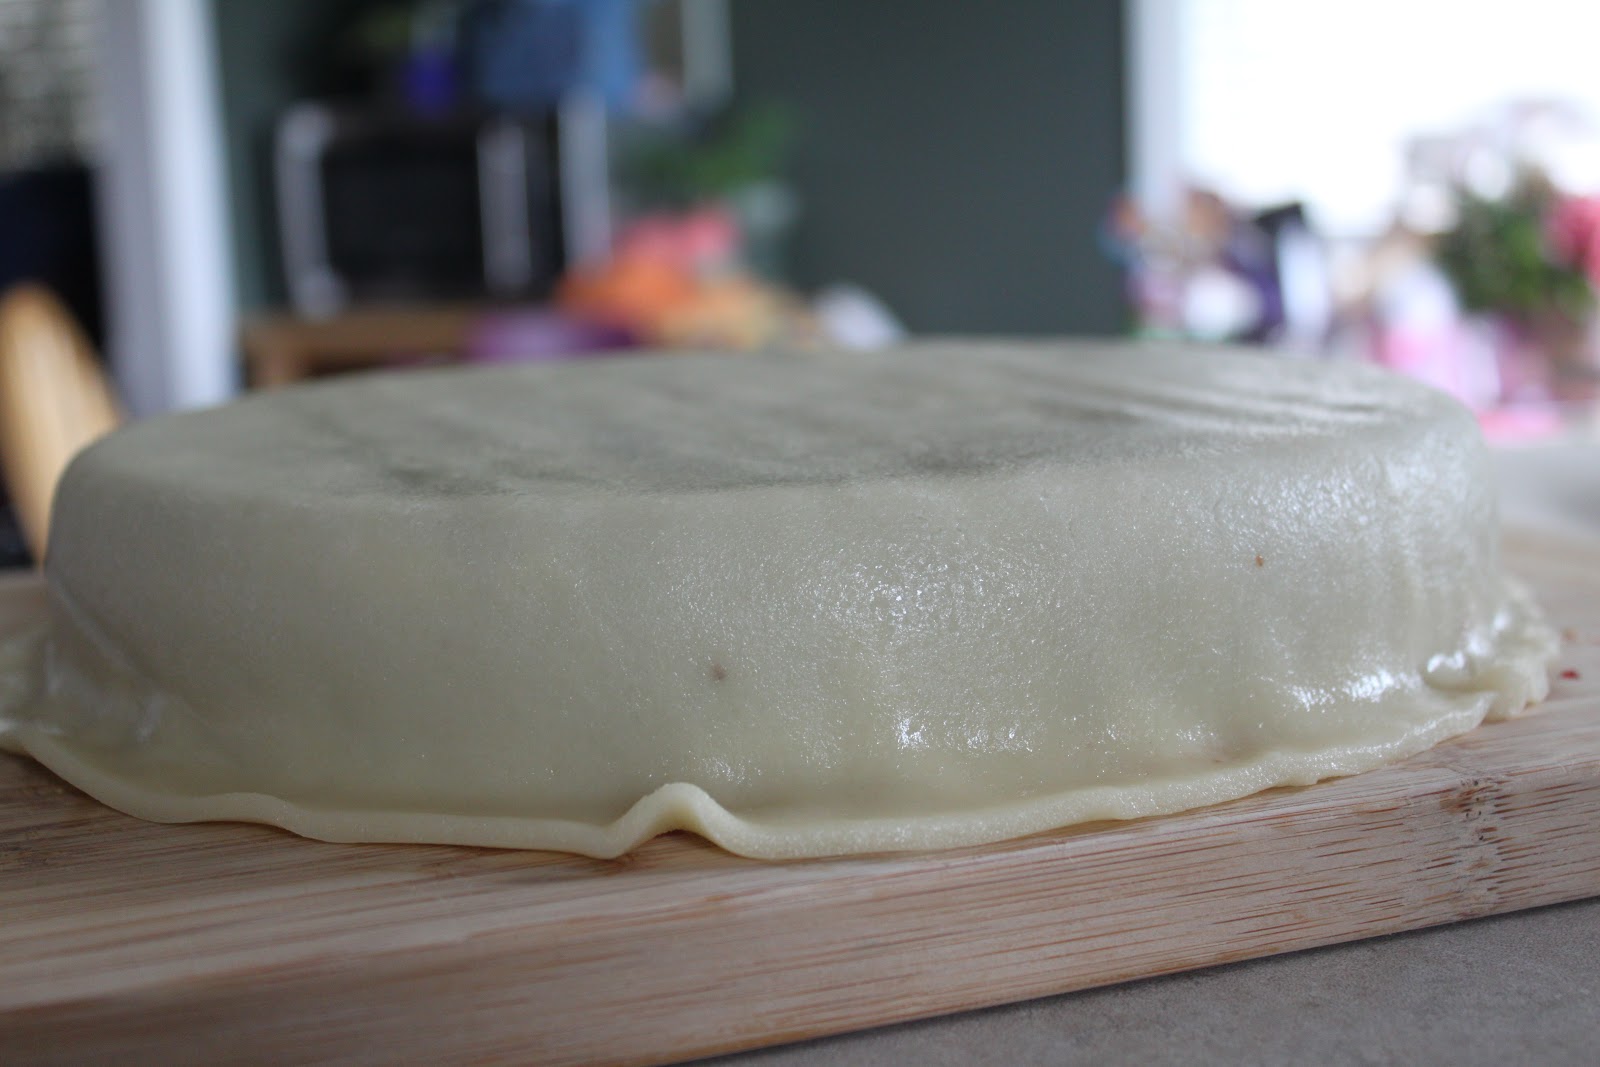
7. For a perfectly smooth finish, cut out any folds with a knife and mooth the joins tongether until they blend.
8. Trim off excess around the bottom of the cake with a sharp knife to give a smooth finish.


9. Smooth surface with palm of your hand.


I had purchased a Carebear Edible Image from Ebay months ago and was ready to use it.  Unfortunatley it wouldn't come off the baking paper it was on (even though it was supposed to easily come off), so I really wouldn't recommend it.  I just stuck it on the cake, decorated over the torn spots that happened when we tried to pull the image off, took some pictures and then took the image off again and enjoyed the cake. :)  


If you try to make your own marzipan and roll it, please drop me a line and let me know how it turned out.  Let me know if you ever try the White Chocolate Brownies, and be sure to refer to the original Brownie recipe in the link above, as I've left a couple of ingredients and steps out for the cake!


Linking up with Skip to My Lou

ING Direct Promotion


First of all, to learn more about ING Direct, please check out this older post of mine.  ING Direct has a promotion on right now until December 31, 2011.  If you sign up with them, you get $50, instead of the regular $25.  If someone refers you to them, for example me, and you give ING my Orange Code, I will get $50 as well.  So the Math is easy.  If you sign up, you get $50.  If you then get your spouse to sign up and she provides them with your orange key, you get another $50 and she gets $50 and so on.  You can refer as many people as you want, up to getting $2000 in bonuses.

The great thing with this is, that if you decide in a couple of weeks that you don't like ING, cancel the account, but keep the cash. :)

Just in case someone would like to sign up, but does not have anyone to be referred by, I would be happy to give you my orange code and earn $50 (just leave me a message below).  Go to their website to check them out:


ING also has Kids Savings Accounts.  As far as I know they give the most interest for Kids Savings Account out of any bank right now and there are, as always, no fees.  Your child also gets $25 (maybe it's also $50 currently, but I couldn't find the information on line) for signing up.


FREE Kleenex Brand Share Pack


The SOFTNESS WORTH SHARING by KLEENEX is back again.  This is very exciting!  Send a cute FREE Travel Pack of Kleenex to someone you know - or yourself. :)  If it's the same as last year, you get to do it once a day!  These small packs are perfect to keep in the glove box of your car, purse, backpack or diaper bag.  Enjoy!

Here is the website:
https://www.kleenex.com/softnessworthsharing?wt.mc_id=email_knx_SWS-Newsletter110911


Saturday, August 27, 2011

Thumb print Birthday Card


Since I did not have a birthday card for my gorgeous god daughter, I figured, Olivia and Lexie could make her one using their thumb prints.  I think home-made cards are a lot more special anyway, especially when they come from little ones. :)  We ended up making two cards, one for my god daughter's little brother as well, as their birthdays are only a month apart.


I actually bought the card stock paper - pastel at the Dollarama for $1.50.  It comes in a package of 100 with the following colours: yellow, green, blue, pink and purple.  I also bought the ink pads at the Dollarama - I got blue, yellow and purple.  I love using those, as it's SO easy to clean your baby or toddlers fingers, hands or feet.  You just use a wipe after using it and it's a no mess clean-up.


Making birthday cards does not get any simpler than this.  We used Olivia's thumb prints for the big balloons and Lexie's thumb prints for the little balloons.  Then I drew a string on each of the balloons and drew some easy birds for a little bit of life to finish up the birthday cards.


Linking up with Skip to My Lou

Friday, August 26, 2011

Spaetzli with Pork and Sauce

Prep and cook time (meat and sauce): about 40 minutes
Prep and cook time (everything): about 1hr, 15 minutes

First off , before I really get into this, the prep and cook time for everything might be high.  I am not the best multi-tasker.  The time I indicated is me doing the spaetzli first, they moving onto the other stuff.  See the alternatives at the bottom that can speed things up some.

(c) Helpful Daddy 2011

Oh wow!  I has been ages since I have posted a recipe.  The laziness is just completely uncalled for.  I have had the pictures for this recipe for months now, and yet, it is just now that I am deciding I can post it.  My title for the recipe is fairly self explanatory; Spaetzli with Pork and Sauce.  The recipe for the Spaetzli can be found here.  It is dead easy to make.  I believe for this current recipe, I had some frozen in the freezer.  Anyway, the pork recipe I have to give some credit to my mother in law, who's similar recipe was the inspiration for this one.  Here is what you will need:

2 Pork Tenderloins
1 large onion, diced
2-3 carrot, sliced thin
2 cups chopped broccoli
2 cloves garlic, finely chopped
3 cups chicken stock
1 cup heavy cream
3 tsp of flour (or corn starch)
2 Bay leaves
2 generous pinches of sage
3-4 cloves
Salt and Pepper to taste
2-3 tbsp extra virgin olive oil


Preheat skillet or pot to about medium heat.  Remove the silver skin from the tenderloins while the pot is heating up.  Season the meat with salt and pepper.  Put the EVOO into the pan, and then cook the meat - about 7 minutes a side or until done.  While the meat is cooking prepare the veggies.  When the meat is done, remove it to a plate for the time being.  In the same pot, add a little more olive oil and toss in the onion, garlic and carrots.  Saute for a few minute to help remove the stuff stuck to the bottom from the meat.  

Add the chicken stock, broccoli, and herbs and reduce the heat to a simmer.  Simmer for about 15-20 minutes, or until the carrots are to the desired tenderness.  While the sauce is simmering, slice the meat into 10cm (~1/2") slices.  Make sure that you keep any of the juices that come out of the meat while cutting it - we will add it to the sauce for more flavour.  When the stock is done cooking, whisk the flour into the the heavy cream and add to stock and keep stirring until it is incorporated.  Add the meat back to the sauce to warm back up again.  Serve over the spaetzli with some shredded cheese.


-Note, it goes without saying, but don't eat the bay leaves of cloves.


Alternatives:

-As always you can reduce the calorie and fat content by replacing the heavy cream with evaporated milk

- If you aren't down with the home made spaetzli, you can buy pre-packaged stuff that cooks like pasta

- You can also use pasta, rice, or mashed potatoes.

-Add any other veggies you like to jazz it up.

That's all for now

-d
o_0

Linking up with Skip to My Lou

Wednesday, August 10, 2011

Graham Cracker Ice Cream Sandwiches by Jessica Seinfeld

I figure I should post the Graham Cracker Ice Cream Sandwiches by Jessica Seinfeld from her cookbook Deceptively Delicious before the summer is over, so here is the recipe:


Prep Time: 5 minutes
Total Time: 120 minutes
Makes 8 sandwiches

*2 cups lowfat plain yogurt
*1 cup sugar
*1 cup lowfat (1%) buttermilk
*2 tablespoons lemon juice
*Grated zest of 1 lemon
*16 lowfat graham crackers, broken in half (32 squares)
*Shredded coconut (optional)


1. In a large bowl, whisk together the yogurt, sugar, buttermilk, lemon juice, and lemon zest.  Transfer to a small bowl, cover, and freeze for 1 to 1 1/2 hours, until the mixture starts to thicken.

2. To form the sandwiches, scoop out and then press about 1/4 cup of the semifrozen yogurt mixture between two graham cracker squares.  Wrap each in waxed paper and freeze 30 minutes, or until firm.

3. If using coconut, put some on a plate and dip all four edges of the sandwich to coat.


I have to be honest, I liked these, but didn't love them, but it's probably because I don't love lemon.  If you love lemon and like a healthy snack, this is an excellent, easy and quick way to make your own!  Let me know what you think of them, if you try them out!

Linking up with Skip to My Lou

Friday, August 5, 2011

Yoda Ears

To Andrew's Mum and sisters: yep, that's how long Andrew's hair is now!

I can't help myself and have to share this.  Tonight, Olivia figured that Daddy needed "Yoda Ears" (the general public would call them pig tails), too.  This is what Olivia came up with, after brushing Daddy's hair - well ok, I helped a little...


These are Olivia's Yoda Ears.

...and since we are talking about Yoda.  Here's another visual. :)


Thursday, August 4, 2011

Emerson - Mommy's Nose is Scary!


Our little girl was allowed to watch some Heidi and Care Bear songs on You Tube tonight and also found this video.  It's so cute, I just had to share it here.  Enjoy! :)

Fun Family Crafts - Website

Fun Family Crafts

Check out this awesome site Fun Family Crafts that we are featured on!  It's a really neat site where you can take 30 seconds to sign up (login name, password, e-mail address required), so that you can have your own Craft Box on the site and store tons of cool ideas to make later. I already found some easy to make Smurf Cookies, so exciting!

Tuesday, August 2, 2011

Outside Storm Pictures

Just a quick post from me today (someday, I will get around to uploading another recipe, I am just so lazy).  We are currently having a good ol' fashion summer thunder storm.  It is a beautiful and wonderfully aural spectacle.  At one point during this storm, the clouds started to thin, and the sky turned this bizzarro colour that I hope the pictures give justice.


No, these have not been doctored to look like sepia, this is the actual colour.


That's all I got for now.  Something more substantial soon.

-d
o_O

Sunday, July 31, 2011

Tuesday, July 26, 2011

Face Painting, Balloon Animals & Cotton Candy


Daddy took his little girl to Best Buy the other day, as they had their Grand Opening.  To their surprise they had Face Painting going on, someone was making Balloon Animals and they were giving out Cotton Candy.  Olivia turned into a little Butterfly, got a Puppy on a Leash Balloon Animal and a small bag of Cotton Candy, all of which she was very excited about.  


Every time Daddy says he's going to Best Buy now, Olivia wants to go with him.  As Daddy and daughter were walking towards the front door a couple of days ago, Olivia told Daddy she wanted a Balloon Puppy.  Poor girl was disappointed to hear that the fun activities were only a one time deal.

Monday, July 25, 2011

Cookies & Cream Cupcakes


I decided to make Cookies & Cream Cupcakes for my daughter's first birthday.  I've had them on my Sweet Treats board on Pinterest (feel free to follow me!) for a little while and was really excited to try them.  I think cupcakes are perfect for a first birthday.  I found them on this great blog here but the actual recipe is here.


Makes 24 cupcakes

Cupcakes:
24 Oreo halves, with cream filling attached
2¼ cups all-purpose flour
1 tsp baking powder
½ tsp salt
8 tbsp unsalted butter, at room temperature
1 2/3 cup sugar
3 large egg whites, at room temperature
2 tsp vanilla extract
1 cup milk
20 Oreo cookies, coarsely chopped (I quarter them)

Frosting:

Decoration:
Oreo cookie crumbs
24 Oreo cookie halves (I quarter them)

Preheat the oven to 350˚ F.  Line the walls of two cupcake pans with 24 paper liners.  Place an Oreo halve in the bottom of each liner, cream side up.  


In a medium bowl, combine the flour, baking powder and salt; stir together with a fork to blend and set aside.  In the bowl of an electric mixer, combine the butter and sugar and beat together on medium-high speed until light and fluffy, about 2 minutes.  Blend in the egg whites one at a time, beating well after each addition.  Blend in the vanilla extract.  With the mixer on low speed, beat in half of the dry ingredients just until incorporated.  Add the milk and beat just until combined, then mix in the remaining dry ingredients. 


Gently fold in the chopped Oreos with a rubber spatula until evenly incorporated, being careful not to over-mix.


Evenly divide the batter between the prepared cupcake liners.  


Bake for 18-20 minutes, rotating the pans halfway through baking, until a toothpick inserted in the center comes out clean.  Allow to cool in the pans 5-10 minutes, then transfer to a wire rack to cool completely.


Frost the cooled cupcakes as desired.  Sprinkle with Oreo crumbs and garnish decoration with Oreo halves or quarters.   


These cupcakes turned out absolutely delicious.  My favourite part of them was the bottom (half the oreo cookie with the cream part on it).  I will definitely be making them again!


Linking up with Skip to My Lou
Related Posts Plugin for WordPress, Blogger...